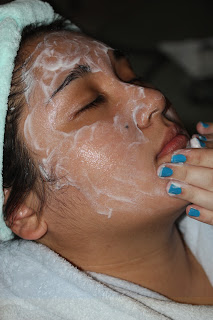
Today I’d like to officially welcome Lisa to the Gilded
Lily Beauties, as she allows me to demonstrate our all-natural Fruit Salad
Facial on her!
 |
| We were also joined by our good friend, Johnny! |
Every girl needs a little pampering. This is a great tutorial
for non-sensitive skin types for any time you have a day off and want to treat
yourself to something luxurious and exotic. All of the ingredients are natural and
most can be purchased at the grocery store. Lets begin!
Prepare by slipping into something comfy, like a fluffy bathrobe. Also, make sure your hair is pulled away from your face.
Phase 1: Cleanse- Brightening Lemon Yogurt Cleanser
As we’ve already stated, Greek yogurt is a wonderful
product to use on your skin as it provides it with necessary proteins and
purifying lactic acid. Here we combine it with lemon juice, whose naturally
antiseptic acids will remove excess oils on your skin, plus its brightening
properties will make it glow. Chilled water (don’t prepare it until you’re
ready to use it, or the ice cubes might already be melted) will soothe the skin
and make sure that the lemon doesn't over-perform, leading to dryness or irritation.
Ingredients:
Greek yogurt
Half a lemon
Ice Water
Cotton rounds
Step 1-
Place a large dollop of Greek yogurt in a bowl.
Step 2-
Squeeze half a lemon into the yogurt. Don’t worry, it
won’t curdle!
Step 3-
Mix the two ingredients until they reach a liquid
consistency.
Step 4-
Apply the mixture to your face and gently massage it all
over, avoiding your eyes and mouth. If the smell bothers you (hey, the smell of
Greek yogurt isn’t everyone’s cup of tea!) also avoid the space right under
your nose.
Step 5-
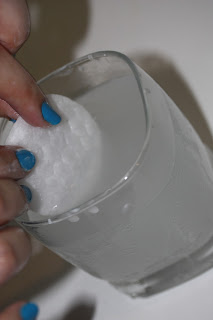
Dip a cotton round into the ice water and use it to wipe off the cleanser. Your fresh skin is now ready for part 2!
Phase 2: Exfoliation- Luscious Strawberry Lime Sugar
Scrub
Strawberries are rich in alpha-hydroxyl acid, which will
help slough off dead skin cells. Lime will also help with this, along with
purging your pores and removing acne-causing bacteria. The brown sugar will
give the scrub a wonderfully exfoliating texture, plus can absorb any of the
dirt that the lime leaves behind.
Ingredients:
Strawberries
Half a lime
Brown sugar
Step 1-
Now to prepare our luscious face scrub! Start by slicing
up a few strawberries.
Step 2-
Squeeze half lime onto the slices and let them soak in
the juice for a few minutes.
Step 3-
Throw the mixture into the blender and blend until the
fruit is pureed.
Step 4-
Pour about a third of your brown sugar into the
strawberry-lime puree. Mix it well, but don’t worry if the sugar appears to
dissolve a bit.
Step 5-
Now, little by little add spoonfuls of the sugared puree
into the rest of your brown sugar (you might not use all of it) and mix until
it forms a thick, grainy paste.
Step 6-
Rub it all over your face in circular motions. Make sure
to really work it in there! When you’re done, rinse your face with cold water.
Phase 3: Steam- Freshening Orange Mint Steam
Orange and mint give this facial steam the perfect
combination of soothing and detoxifying, with a dash of Vitamin C. If you can’t
use pure mint tea, you can substitute it with peppermint black or green tea
like we did.
Ingredients:
An Orange
A few bags of mint tea
Enough water to fill a pot
Step 1-
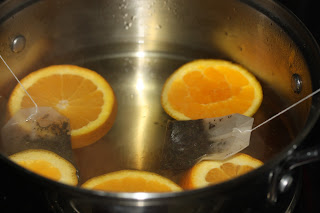
Fill a large pot with water and slice an orange into it. Begin
boiling.
Step 2-
When it begins to steam, hang the teabags from the sides
of the pot
Step 3-
When the water begins to boil and the tea has been
thoroughly steeped (water will be dark) take it off the stove.
Step 4-
Pour the hot water (carefully!) into a large bowl.
Step 5-
Lean over (again, carefully, please!) and drape a towel
over your head and shoulders. Let the steam from the hot water float up and purify
your skin. You can stay under the towel for about five minutes. If it gets too
hot, simply lift a corner of the towel up and let a bit of cool air in.
 |
| Glowing! |
Phase 4: “Peel”/Extractions- Revitalizing Grape “Peel”
Grapes are known to help brighten your skin, as well as
evening out your skin tone. The gelatin will give the grape concoction a
stickiness that will help it work on your skin, though it won’t be like the
regular peels or peeling masks you commonly see in facials.
Ingredients:
A handful of grapes
One package of unflavored gelatin
Hot water
A pore extractor (optional)
Step 1-
Grind the grapes until they are thoroughly mashed up.
Step 2-
Heat up some water (according to the instructions on the
gelatin package) and pour it into a small bowl.
Step 3-
Pour in the mashed grapes.
Step 4-
Stir in the gelatin and place it in the fridge. You’ll
want to leave it for about half the time directed on the package. You want the
mixture to still be mostly liquid.
Step 5-
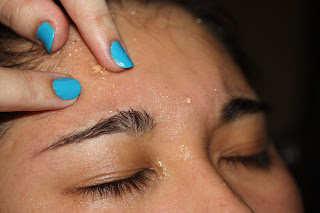
Rub your grape “peel” over your face. Be sure to use any
solid bits you find. The mixture will be stick to the touch. Leave it for a few
minutes (you should experience a “tightening feeling”) then remove with water.
Follow this step by using your pore extractor tool (this part isn’t
photographed as Lisa opted to not have extractions done) to purge out any
lingering blackheads.
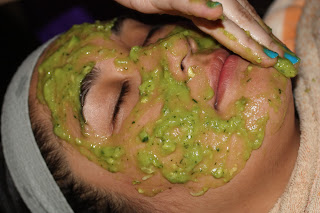
Phase 5: Masque- Rich Avocado Cucumber Mask
Though gentle on skin, this masque packs a beneficial
punch of moisture (from the healthy fats in the avocado,) hydration and vitamin
K (from the cucumber,) and antioxidants (from the honey.)
Ingredients:
¼ of an avocado
½ a cucumber
A drizzle of honey
Step 1-
Cut up your avocado and cucumber, then throw them in a
blender. Add a drizzle of honey on top.
Step 2-
Blend them until they are thoroughly pureed. Kinda looks
like guacamole, doesn’t it?
Step 3-
Cover your face with the mixture. If you’d like, cut two
extra slices of cucumber and place them over your eyes.
Step 4-
This step is optional, but consider sharing with a
friend! Give each other foot rubs while the mask works its magic. Wash off
after fifteen minutes.
Phase 6: Moisturizer- Softening Papaya Moisturizer
Now to wrap up our delicious spa treatment with a
homemade moisturizer. Papaya is easily one of the best things you can use for
your skin. It contains anti-aging properties, antioxidants, vitamin A, and can
help brighten your skin. Combined with the hydrating vitamin C of grape seed
oil and balancing vitamin E of argan oil (both available at beauty supply
stores and some pharmacies) you can’t go wrong!
Ingredients:
A few chunks of papaya
Grape seed oil
Argan oil
Step 1-
Pour a splash of grape seed oil into a bowl.
Step 2-
Add a few drops of argan oil.
Step 3-
Throw in a few slices of papaya.
Step 4-
Mash up the papaya with a fork. Muddle it well into the
oils.
Step 5-
Separate the solids bits (you won’t be using these) from
the liquid. The oils should have turned orange from the papaya essence.
Step 6-
Lightly dab the liquid onto your face.
You are now done with your Fruit Salad Facial! Your skin
should feel thoroughly moisturized and refreshed and have a gorgeous glow to go
along. Wait at least one day before applying make-up and don’t forget to follow
a healthy skin regiment.
 |
| I don't always get fruit facials, but when I do, I prefer The Gilded Lily's Fruit Salad Facial. |
Enjoy!


