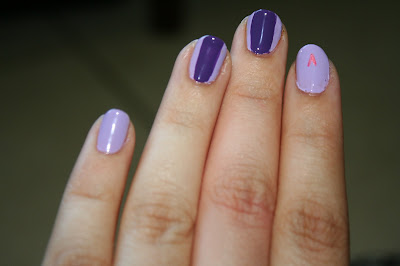
I have to be honest with you guys: I am a total Brony. Say
what you will about the fandom, but the show is just darn cute. So when they
coined the term “hooficure” in the second season, I just knew I had to come up
with some fun tutorials for MLP:FIM fans everywhere! And which character to
better start with, than the show’s protagonist, Twilight Sparkle?
Tools you’ll need:
Purple Nail Polish (OPI Nail Lacquer in Funkey Dunkey)
Lavender Nail Polish (Sally Hansen Extreme Wear in Lacey
Lilac)
White Nail Polish (Sally Hansen Extreme Wear in White Out)
Indigo Nail Polish (Essence Color and Go Polish in Just Rock It)
Hot Pink nail polish or nail art pen (Sally Hansen Nail Art
Pen in Hot Pink)
Nail art brush (available at beauty supply stores)
Step 1:
Paint your nails with the lavender shade. You’ll want this
to be a very pigmented type, like the Sally Hansen one, as you won’t want too
many layers mucking the design up. Make sure it is perfectly dry before
continuing.
Step 2:
Use the purple color to paint some thick stripes down the
middle of your middle and ring finger nails. Go slowly, to keep these as even
as possible. If you need to add a second layer, go ahead, but do so very
carefully.
Step 3:
On your index finger, start drawing Twilight’s Cutie Mark.
The key to this design is drawing little triangles to make the star shape, and
then filling them in. Begin with a diamond shape and remember to take your
time.
Step 4:
Apply the same technique in drawing the diagonal points of
the star.
Step 5:
When your purple stripes dry, use the indigo color to paint
a thinner stripe inside of them.
Step 6:
With a very fine nail art brush use the white polish to
create the little rays between the points of the star. I don’t recommend using
a nail art pen or French manicure pen for this part, as you want very skinny
lines and those could be messy here.
Step 7:
Using the dotting tool on the other end of the nail brush,
dab little white shapes (two above the star, three on the bottom.) Keep them
loosely formed, so they resemble stars from far away, but don’t use too much
polish at once to avoid messes. Don’t worry if they aren’t perfect, though.
They’ll be very tiny. I achieved these by using three little dots to mimic a
star shape.
Step 8:
Paint a pink stripe within the indigo ones. Wait until
everything is dry, then add a layer of top coat.
Enjoy your magical nails!


No comments:
Post a Comment