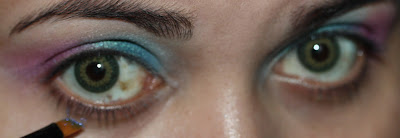
Missed the county fair last time it was in town? I did. No
corn dogs, no cute petting zoo, no roller coasters, no tilt-a-whirl, and no
beautiful, pastel toned cotton candy. While there’s not much I can do about it
until next year, I am cheering myself up with this lovely little cotton candy
inspired eye tutorial. I decided to use a sparkly theme for this, but you can
choose matte tones if you’re fonder of those. To join me, you’ll need:
Eye lid primer (Nars Smudge Proof Eye shadow base)
Turquoise Eye Shadow (L’Oreal Bright Shadow Duos in Showy,
lighter shade)
Magenta Eye Shadow (L’Oreal Bright Shadow Duos in Reckless, lighter
shade)
Light pink Eye Shadow (NYX Trio Eye Shadow in Cherry/Cool
Blue/Hot Pink)
Baby blue Eye Shadow (Ditto)
Indigo Eye Shadow (Instant Beauty Loose Powder in Screaming
Purple)
Black gel liner (Maybelline Lasting Drama Gel Liner in
Blackest Black)
Lavender pencil liner (YSL Pencil liner in Purple Silk)
Black pencil liner (YSL Waterproof pencil liner in Velvet
Black)
White Eye Shadow (Estee Lauder eye shadow in Tranquil Moon)
For the tools, you’ll want either sponge-tip applicators or
whichever brush is more comfortable for you to apply an even wash of color. You’ll
also want a couple of angled brushes. Don’t forget to include your favorite
mascara (YSL Singulier Waterproof in Vibrant Black!)
Step 1-
Totally optional, but I love how purples and lavenders look
with green eyes, so I threw my contacts on!
Step 2-
Prime your lids only! You’ll want the most vibrant color
here.
Step 3-
Apply turquoise eye shadow to the inner half of your eye.
Try to make it even and don’t be afraid to deposit a lot of color. You want
this to be bold. It’s okay if the color fades a little bit towards the middle,
though.
Step 4-
Fill in the other half of your lid with the magenta eye
shadow. If the eye shadow base is too dry at this point, consider adding a
little more. Otherwise, work through Steps 3 and 4 quickly! My suggestion is to
prime and paint one eye at a time.
Step 5-
With your brush, lightly blend the line where the two colors
meet. It should turn a lovely shade of purple. You’ll want to create a gradient
effect.
Step 6-
Dab some of the light pink shadow along the area you painted
magenta, in the crease. Make sure the two colors blend.
Step 7-
Do the same with the inner corner of the crease and the baby
blue shadow. The final effect is to have the darker shades fading into the
lighter ones.
Step 8-
Line your bottom lids using the indigo shadow.
If you’re using loose powder like me, you might want to add a little primer to
avoid fall out. If not, just make sure to keep a steady hand and dab off excess
product before you bring it to your eye.
Step 9-
Liner your top lids with black gel liner. Be careful to keep
the liner relatively thin.
Step 10-
Extend the black liner outwards, in a cat-eye shape.
Step 11-
Use your lavender eyeliner to draw in a connection between the
black liner and the indigo shadow. The soft texture of the pencil should allow
you to create a gradient effect between the two colors.
Step 12-
Add a small dab of white shadow in the inner corners of your
eyes and sweep it over your brow bone, above the pink and baby blue. This will
bring the look together.
Step 13-
Wrap things up with a sweep of black pencil liner on your
water line and mascara.
Enjoy!


No comments:
Post a Comment